Office 365 Tip: Configuring Page Hierarchy on Public Web site
This post is intended as quick and simple guide for configuring hierarchy of pages (friendly URLs) on Office 365 Public Site collection. As Public Site does not offer users any direct to Managed Navigation configuration – as written in more details here, configuring page hierarchy can be done by using EDIT LINKS command in Top Navigation Bar:

Once you enter Edit Mode, you can re-arrange hierarchy of pages in the navigation:

In this example, we have two pages which are visible in navigation:
/preview
/preview1
When you need to change the hierarchy, all you need to do is to grab the link you want to move with the mouse, drag it under a link you want and hold it there until box with text "Drop link here" appears.

Then you drop the link in the box. You will be asked to confirm if you really want to change page hierarchy.
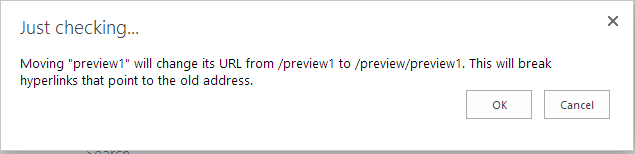
Links are now reordered:

After clicking "Save", your changes will be saved.

Now pages have the following URLs:
/preview
/preview/preview1
One final advice: From my experience, best behavior of EDIT LINKS configuration is achieved when your master page is one of OOTB Master Pages (seattle or oslo). If you have Custom Master Page set to one of your own custom designs, try opening "Site Settings" page, as it uses System Master Page, which is most likely not changed from default settings.


